OTTO-ROS2 - Simulation
What is OTTO-ROS2 ?
OTTO-ROS2 is my custom design robot inspired from the open-source OTTO robot. Natively designed for walk mode only and mainly for arduino software, OTTO-ROS2 is a bimodal robot. It is able to walk, roll, perceive his environment and navigate autonomously. It shares similar functions like a robot vacuum.
Why did I start this project ?
I was interested in robotics. Watching engineering systems (a set of components that work together to achieve a specific technical goal.) being able to do certain things like moving in motion is fascinating to me. I wanted to build one by myself, but I didn’t know where to start. After having watched a bunch of videos on youtube about robotics, I came up with two things: an idea about what kind of robot I want to build and a development platform where I could lay down the infrastructure to build the robot. The platform is called ROS2.
What is ROS2 ?
ROS2 is a development platform for robotics which provides tools and infrastructure for communication between robot components, control systems, simulation, navigation and many more. What I really like with ROS2 is the fact that you can simply and easily design your project to work in a simulated world then use the same design (with minor changes) on a real robot, in a real world.
More about the idea
By watching those videos on youtube, many of them were referring to starting with OTTO robot as a first robotic project. Because it has a big community behind, components can easily be found and the development platform (Arduino) is beginner friendly. In addition, the result is not bad to see. The interesting part of OTTO Robot is the fact it is an easy customizable robot. Meaning that you can calque the foundational structure of it then add your own features, do it in a different platform. You can guess what kind of custom robot I wanted to build… Basically, my initial requirements were:
- The robot shall walk in four directions (top, down, left and right) controlled by a remote controller.
- The robot shall roll in four directions still by remote control.
- The robot shall seamlessly switch between both modes (walk and roll).
- When set a goal pose, the robot shall be able to walk or roll autonomously to the designated position.
- The robot shall be able to communicate its states (battery power, walking mode, rolling mode) on a screen display.
- The robot shall be controlled via a web app interface on mobile
- The allocated budget to build a functioning robot must be less than 250€.
Development Journey
Since I have decided to go with ROS2 as a development platform, I thought that the project development would be efficient to start with a simulation. Where I could design, modelize and test the robot, before moving on a real hardware architecture. This approach will cost zero euro but will be a complete learning journey.
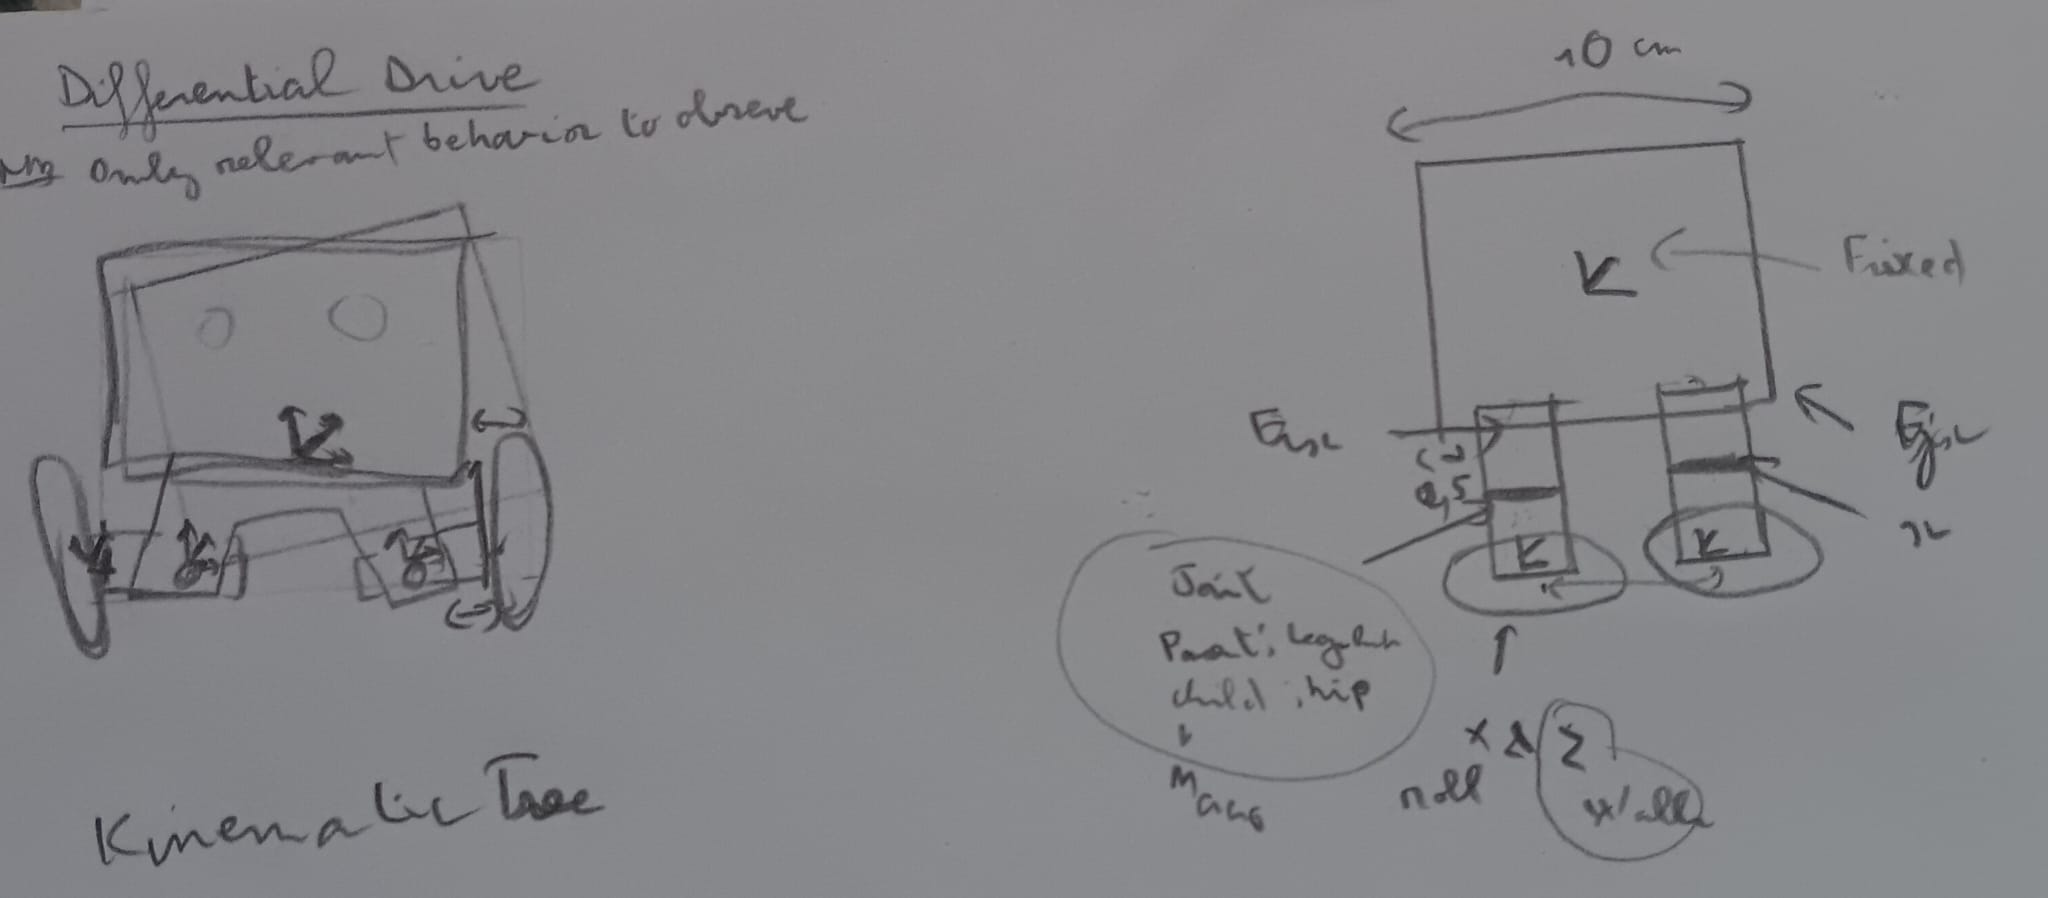
So not wasting time, I started brainstorming the robot on a piece of paper then learned the basics of ros2 (nodes, topics, launches, controllers…)
Robot modeling in the simulation
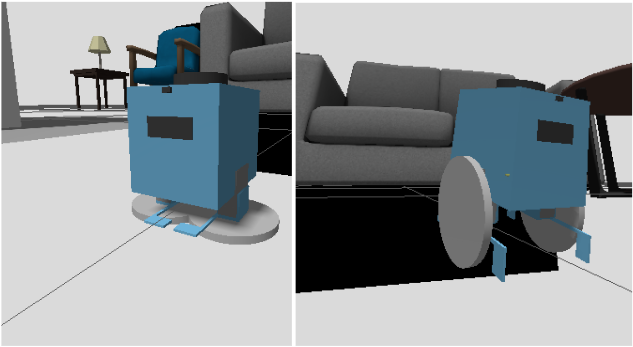
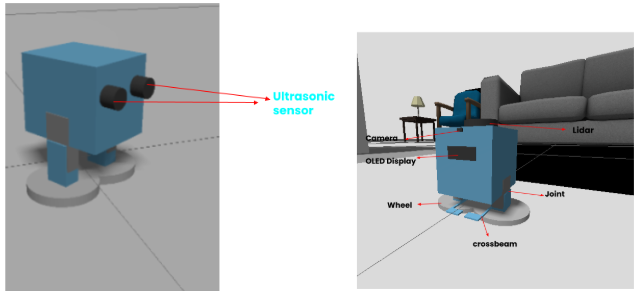
In order to visualize the robot into the simulation (Gazebo), I wrote the robot representation in a special file format called URDF, which is a YAML file that describes the robot’s geometry. It defines all the links and the joints that the robot consists of. Moreover, it specifies parameters such as the mass and the inertia of each link thus it makes simulation more realistic and mimics the motion of the real hardware more accurately. The robot modeling went through a series of development phases. The first was characterized by its small size and its eyes which represents an ultrasonic distance sensor. In the latest phase, those distance sensors were replaced by a lidar for more accuracy in distance measurements, a camera was added for the perception, and an OLED display to visualize different states of the robot.
One of the most challenging parts was managing the physical and software transition between Walking and Rolling. To achieve this safely, I designed a swapping mechanism using the ROS2 controller_manager. When switching modes, the robot first halts all physics, uses a joint trajectory controller to physically tuck its legs 90 degrees into a driving posture, and then dynamically hands brain control over to a differential drive controller. This specific sequencing ensures the wheels and the walking servos never fight each other, allowing the robot to transform flawlessly on the fly.
Build web interface and setup the robot the control robot
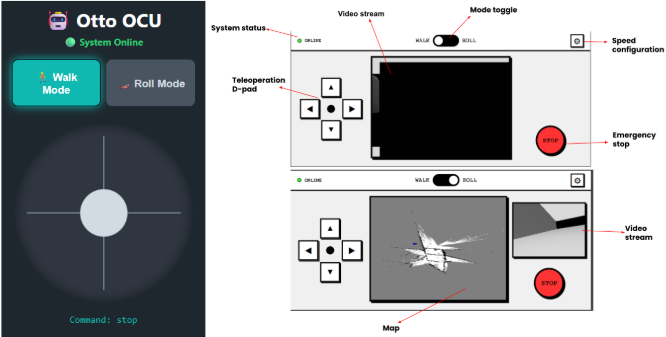
To satisfy the requirement that “The robot shall be controlled via a web app interface on mobile”, during the development phase, I designed a quick web app with limited functionalities (two buttons to switch mode, a joystick to control the robot and a debug and a debug display to see which command is sent) to test the bimodal system.
Fast forward, after have implemented and tested the maps generation (with SLAM Toolbox + Nav2) and an autonomous navigation using (AMCL + Nav2), I completely redesign the control interface to be more friendly looking, showing the robot camera in the center (for walk mode) or at the left (roll mode). The map generated by the robot and live rolling of the robot is displayed in the center, only in roll mode. We can also modify the movement speed in the configuration panel at the top-left.
What did I learn from this project ?
In the early beginning of this project, I was too excited to get the project done, I was then relying heavily on AI. I tended to give it instructions to generate high-level code while I was focusing more on the desired outcome than on manually writing and understanding every line of code. You see it coming, I found myself spending hours debugging and fixing unknown issues. I realized that I could not go far with that approach, so I pivot to a new one where I went to learn ROS2 foundational knowledge, break the project down and develop step by step, while using AI as an instructor this time.
What next ?
Designing and building a robot in simulation was challenging but fun to do. The real interesting part will be to make the robot in real life. So that is my next challenge, make the robot come real.
Check out how it works in the simulation
Code base
You can find the complete project on my GitHub repository: OTTO-ROS2 - Simulation.